Shell Scarf Crochet Pattern
There’s something simply beautiful in asymmetry. Sadly, knit and crochet patterns don’t always lend themselves to asymmetrical designs that really work. You’ll see many, many rectangular projects, but oh so few with a little bit of shape interest.
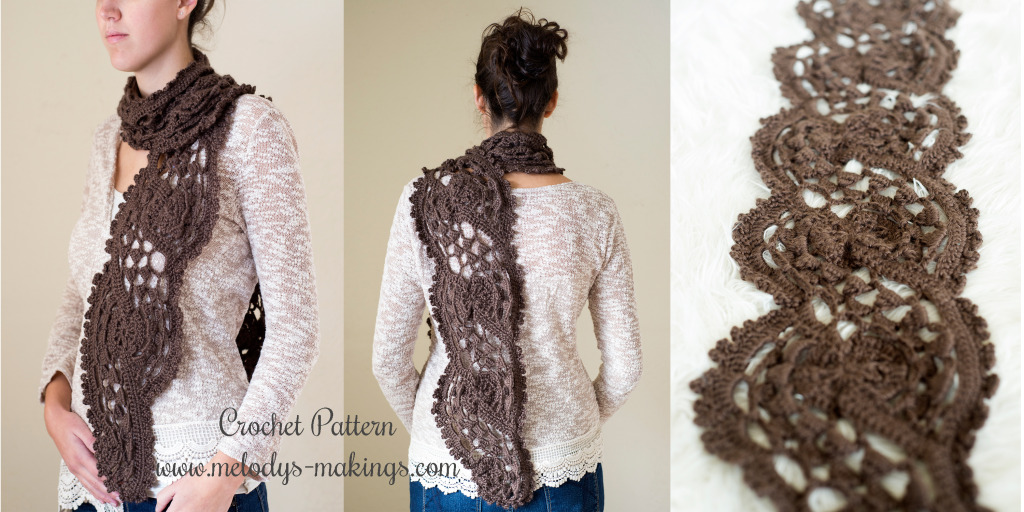
My free Shell Scarf Crochet Pattern was designed to turn heads with the beautiful curves and lines featured. Rather than working the project in rows, you’ll be working in motifs that build one upon the next.
This free crochet scarf pattern features worsted (4) weight yarn making it a great stash busting pattern. Need some gorgeous gifts this spring/summer?
Please Pay With A Share!
1. Head over to Ravelry, add this pattern to your favorites and queue the pattern listing. This is a great way to help designers connect with new customers, and we always super appreciate you taking that extra moment!
You’ll find the Ravelry listing here.
2. Share this blog post with your crafty friends. Please use the handy social sharing buttons at the bottom of this post so your crafty friends can take advantage of this free pattern too.
3. Scroll down to view the pattern OR if you’d like an ad-free PDF copy of this pattern (or to add the pattern to your Rav. library), simply input your email address into this form and I’ll email one over:
Shell Scarf Crochet Pattern
Materials
- Yarn: Approximately 600 yards of worsted (4) weight yarn for a scarf approx. 73 inches (185.5cm) in length (I used Caron Simply Soft)
- Crochet Hook: Size 6.5 mm (K/10.5)
- Yarn or Tapestry Needle
Gauge
6 sts and 4 rows = 2 inches (5 centimeters) in Double Crochet
***It is important to check your gauge!***
Abbreviations
- CH: Chain
- DC: Double Crochet
- Puff Stitch: *Yarn over, insert hook into designated stitch, yarn over pull loop through stitch, yarn over pull loop through 2 loops on hook* Repeat 5 times until there are 6 loops left on hook, yarn over and pull loop through all 6 loops.
- **: Repeat the section in between the two stars as specified
Pattern
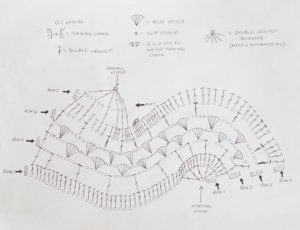
First Shell Sequence Pattern Chart
This chart is to be used as a visual reference and tool to accompany the written pattern.
It should not be used as a substitute for the pattern.
First Shell Sequence Pattern
Chain 3 (starting circle and 2 stitch turning chain)
Row 1: *CH2, DC into center of starting circle* Repeat 4 more times, CH37, Turn Work
(50 total sts not including turning chain) {Reference Photo 7 – *Reference photos provided won’t match exactly they are of “Repeat Shell Sequence Pattern,” however, they will give you an idea of what your project might look like at various stages}
Row 2: DC into third stitch from hook and the next 34 sts, *DC into next stitch, 2 DC into chain space* Repeat 4 more times, CH2, Turn Work (50 total sts not including turning chain) {Reference Photo 8}
Row 3: *DC into next stitch, CH3, skip next two sts* Repeat 3 more times, DC into next stitch, CH6, skip next five sts, *DC into next stitch, CH6, skip next six sts* Repeat 3 more times, DC into next stitch, CH3, skip next two sts, DC into last stitch, CH2, Turn Work (56 total sts not including turning chain) {Reference Photo 10}
Row 4: DC into first stitch, *CH5, Puff Stitch (reference abbreviations section for puff stitch instructions) into 6 chain space from last row* Repeat 4 more times, *CH4, Puff Stitch into next 3 chain space from last row* Repeat 3 more times, CH1, DC into last stitch, CH2, Turn Work (53 total sts not including turning chain) {Reference Photo 11}
Row 5: *CH5, Puff Stitch into 4 chain space from last row* Repeat 3 more times, CH5, Puff Stitch into next 5 chain space from last row, *CH4, Puff Stitch into next 5 chain space from last row* Repeat 3 more times, CH2, DC into last stitch, CH2, Turn Work (53 total sts not including turning chain) {Reference Photo 12}
Row 6: DC into first stitch, *CH3, DC into next large chain space from last row* Repeat 3 more times, *CH6, DC into next large chain space from last row* Repeat 4 more times, CH3, DC into last chain of row 5 before turning chain, CH2, Turn Work (56 total sts not including turning chain)
Row 7: 4 DC into first chain space, *DC into next DC stitch from last row, 6 DC into next chain space* Repeat 4 more times, *DC into next DC stitch from last row, 3 DC into next chain space* Repeat 3 more times, DC into last stitch, CH2, Turn Work (56 total sts not including turning chain)
Row 8: *DC into next stitch, CH2, skip next two sts* Repeat 4 more times, DC into next stitch, skip next two sts, slip stitch into next three sts (these slip sts substitute for a turning chain), Turn Work (16 total sts not including turning chain)
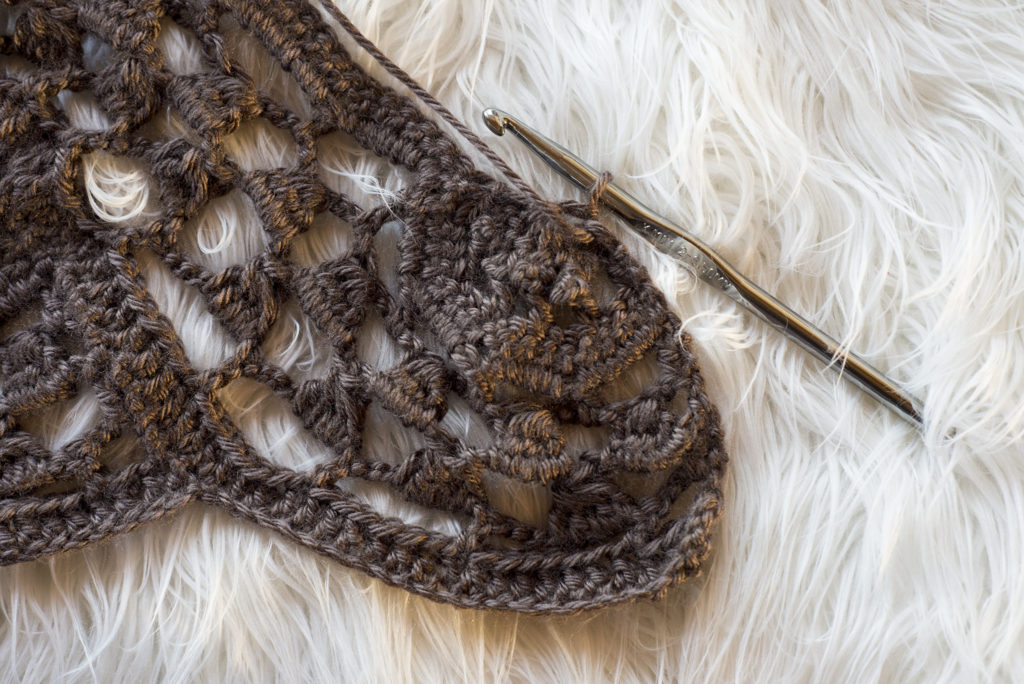
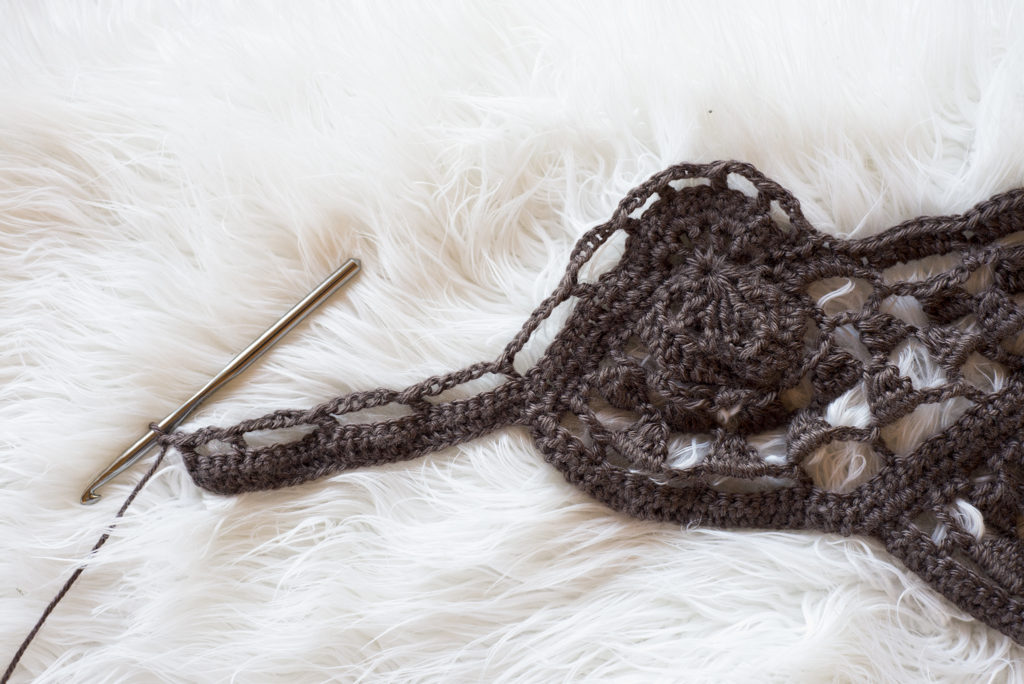
Row 9: DC6tog over the DC sts from the previous row (Double Crochet 6 together into each of the DC sts from the last row until you have 7 loops on hook, yarn over, Pull one loop through all 7 loops.) {Reference Photo 1}
Do not cut yarn. Move on to “Repeat Shell Sequence Pattern.”
Repeat Shell Sequence Pattern
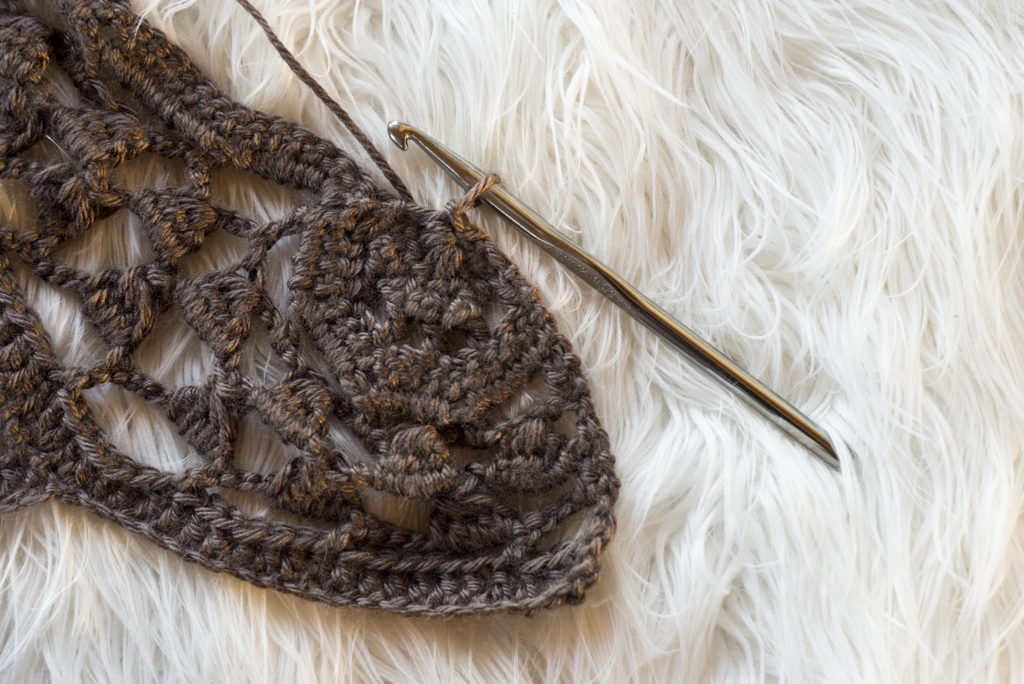
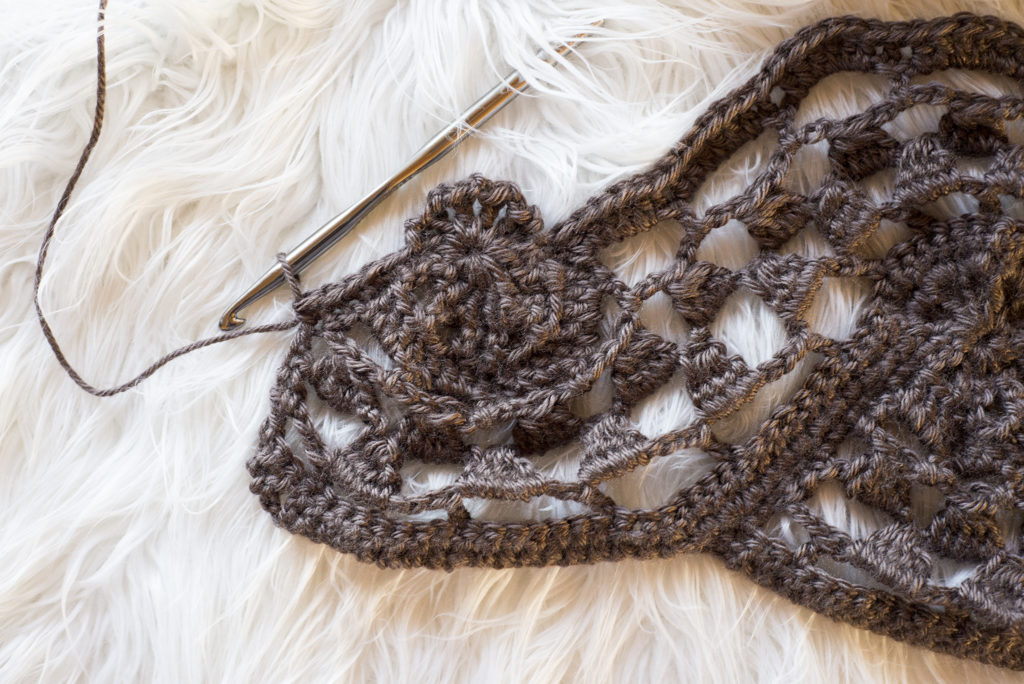
Join work into a starting circle by slip stitching across {Reference Photo 2}.
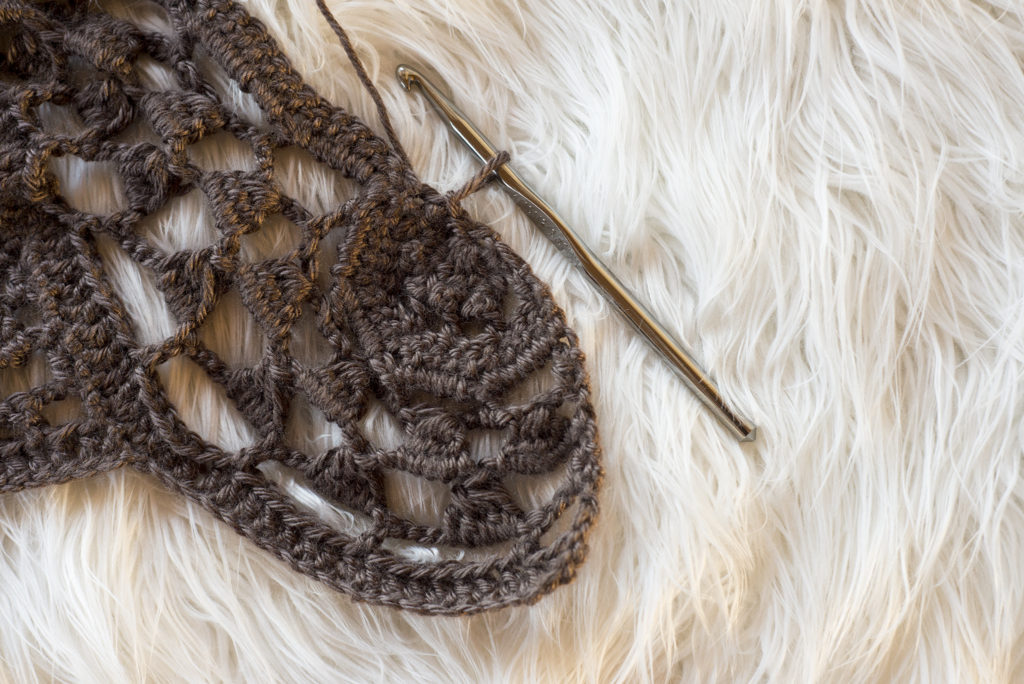
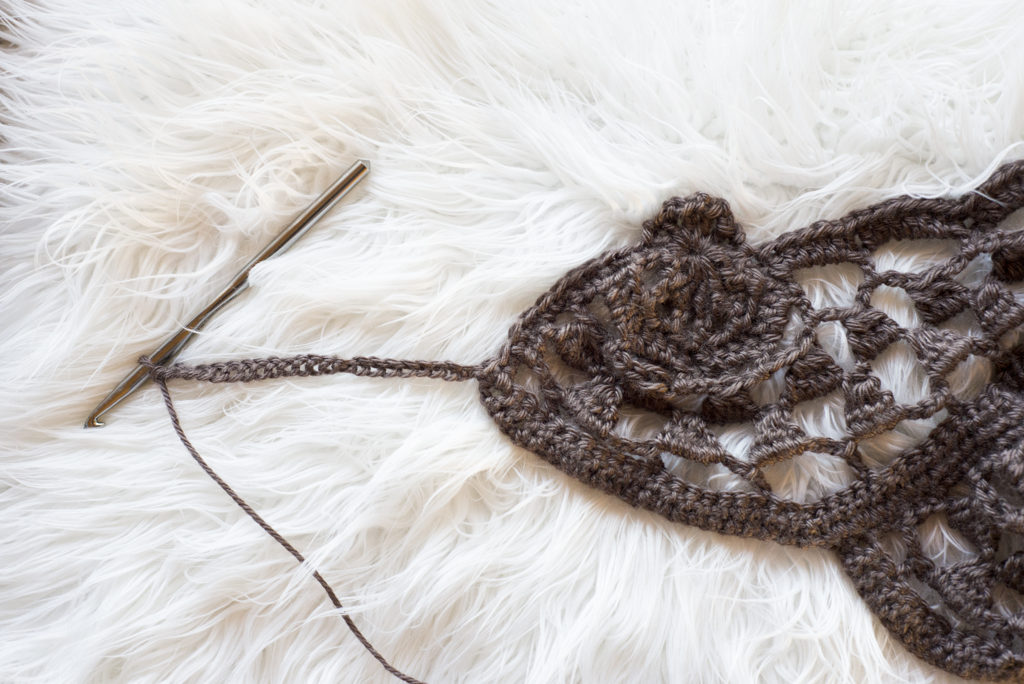
Turn Work, and slip stitch back across the join, and into the next two sts, Turn Work {Reference Photos 3&4}
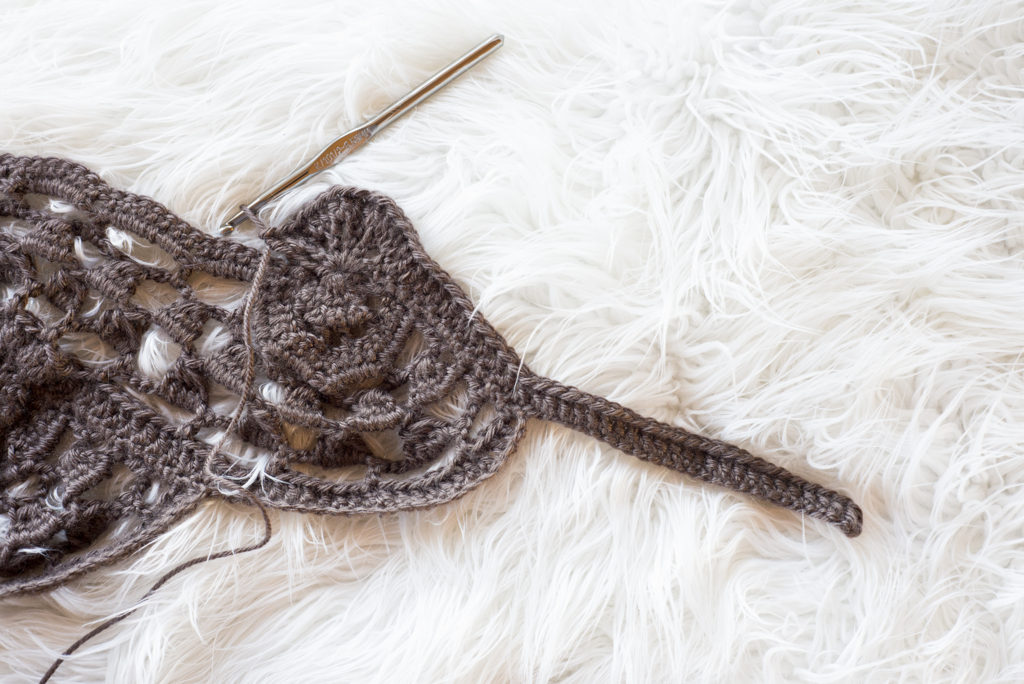
Row 1: *CH2, DC into center of starting circle* Repeat 4 more times {Reference Photo 5}, Single Crochet around the edge of the next 12 sts {Reference Photo 6}, CH25, Turn Work (50 total sts not including turning chain) {Reference Photo 7}
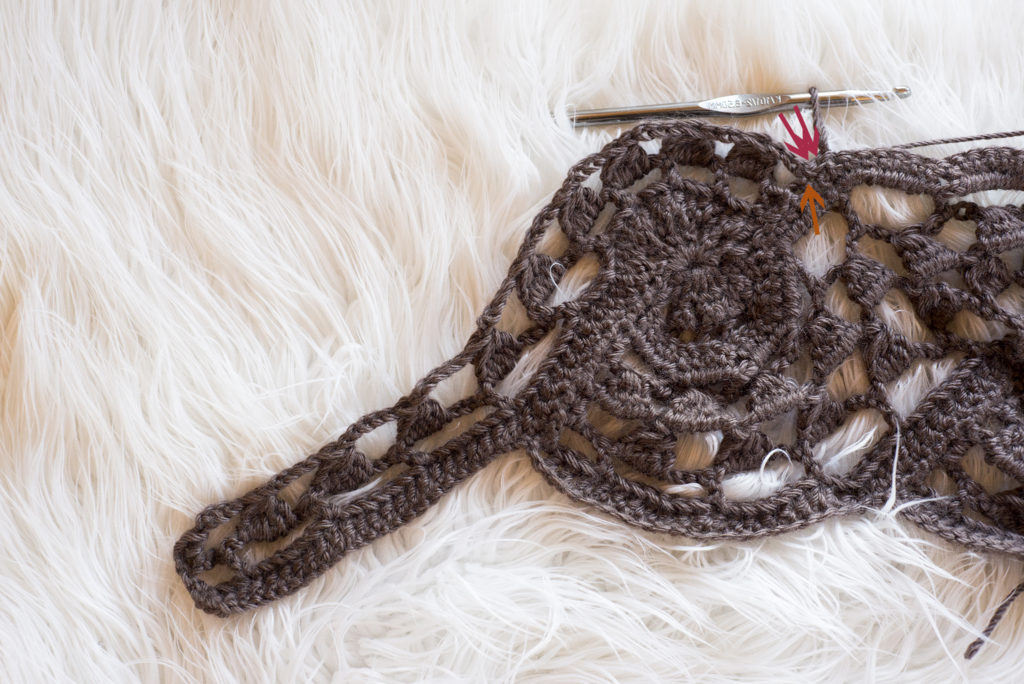
Row 2: DC into third stitch from hook and the next 34 sts, *DC into next stitch, 2 DC into chain space* Repeat 4 more times, slip stitch into edge of prior shell two sts higher than row 1, slip stitch into next two sts (substitutes for turning chain), Turn Work (50 total sts not including slip sts) {Reference Photo 8}
Row 3: *DC into next stitch, CH3, skip next two sts* Repeat 3 more times, DC into next stitch, CH6, skip next five sts, *DC into next stitch, CH6, skip next six sts* Repeat 3 more times, DC into next stitch, CH3, skip next two sts, DC into last stitch, CH2, Turn Work (56 total sts not including turning chain) {Reference Photo 10}
Row 4: DC into first stitch, *CH5, Puff Stitch into 6 chain space from last row* Repeat 4 more times, *CH4, Puff Stitch into next 3 chain space from last row* Repeat 3 more times, CH1, DC into last stitch, slip stitch into edge of prior shell two sts higher than row 3, slip stitch into next two sts (substitutes for turning chain), Turn Work (53 total sts not including slip sts) {Reference Photo 11}
Row 5: *CH5, Puff Stitch into 4 chain space from last row* Repeat 3 more times, CH5, Puff Stitch into next 5 chain space from last row, *CH4, Puff Stitch into next 5 chain space from last row* Repeat 3 more times, CH2, DC into last stitch, CH2, Turn Work (53 total sts not including turning chain) {Reference Photo 12}
Row 6: DC into first stitch, *CH3, DC into next large chain space from last row* Repeat 3 more times, *CH6, DC into next large chain space from last row* Repeat 4 more times, CH3, DC into last chain of row 5 before turning chain, slip stitch into edge of prior shell two sts higher than row 5, slip stitch into next two sts (substitutes for turning chain), Turn Work (56 total sts not including turning chain)
Row 7: 4 DC into first chain space, *DC into next DC stitch from last row, 6 DC into next chain space* Repeat 4 more times, *DC into next DC stitch from last row, 3 DC into next chain space* Repeat 3 more times, DC into last stitch, CH2, Turn Work (56 total sts not including turning chain)
Row 8: *DC into next stitch, CH2, skip next two sts* Repeat 4 more times, DC into next stitch, skip next two sts, slip stitch into next three sts (these slip sts substitute for a turning chain), Turn Work (16 total sts not including turning chain)
Row 9: DC6tog over the DC sts from the previous row (Double crochet 6 together into each of the DC sts from the last row until you have 7 loops on hook, yarn over, Pull one loop through all 7 loops.) {Reference Photo 1}
Repeat this pattern until your scarf reaches desired length. I did a total of 9 repeats for a scarf approx. 73 inches (185.5cm) in length.
After desired number of repeats, join your last row 9 repeat into a circle and secure your yarn. Do not cut yarn. Move onto border pattern.
Reference Photos For Repeat Shell Sequence Pattern
Photo 1: End of shell sequence after finishing the DC decrease worked over 6 sts.
Photo 2: Beginning of repeat shell sequence. Join in a circle by slip stitching across.
Photo 3: Turn work and slip stitch back across the join.
Photo 4: Slip stitch into next two sts (sub. for turning chain).
Photo 5: Turn work and do first repeat section between ** of Row 1.
Photo 6: Single crochet 12 sts into the edge of the previous shell sequence in the middle part of Row 1.
Photo 8: Complete chains as last part of Row 1.
Photo 9: Row 2 completed, minus slip sts at the end.
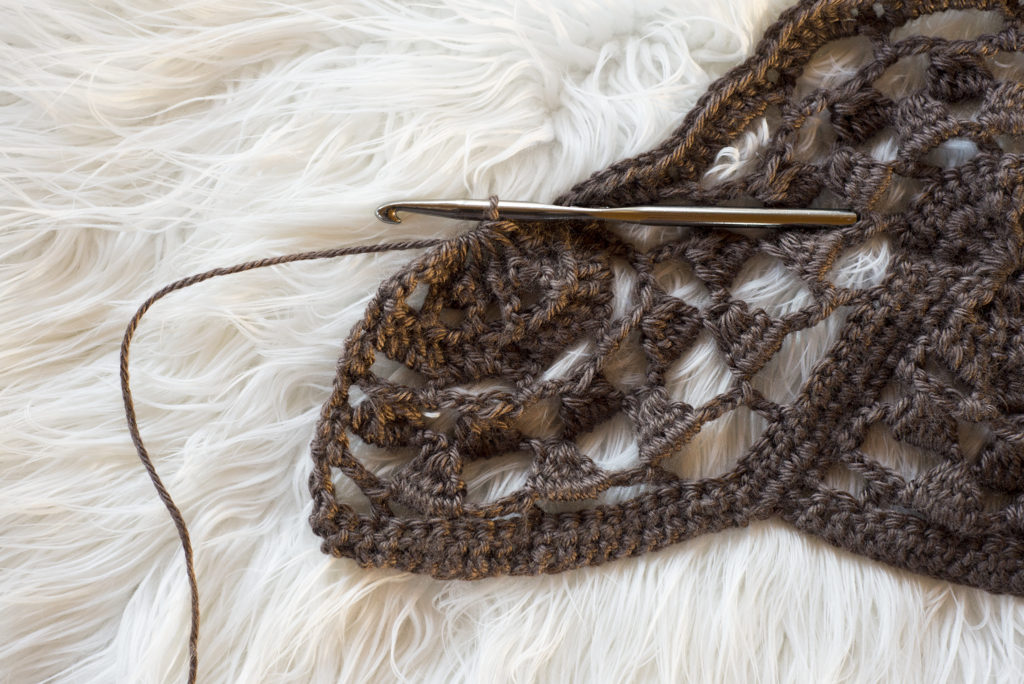
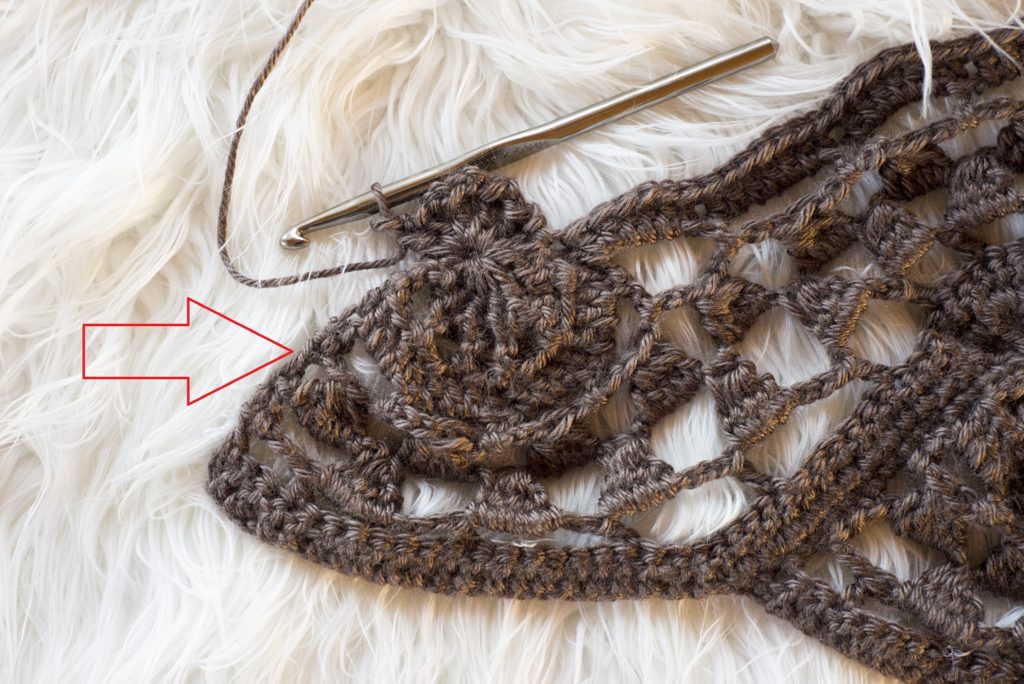
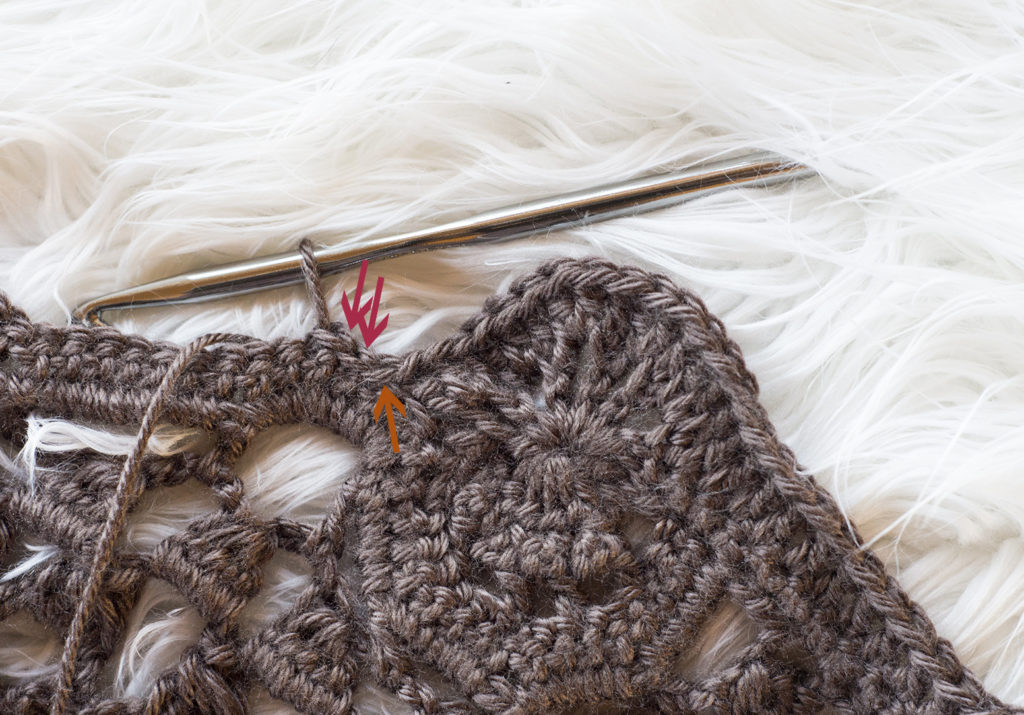
Photo 10: Sample of what slip sts at end of Row 2 should look like for “Repeat Shell Sequence Pattern.” Orange arrow represents slip into edge of prior shell. Red arrows represent slip into next two sts which sub. as turning chain.
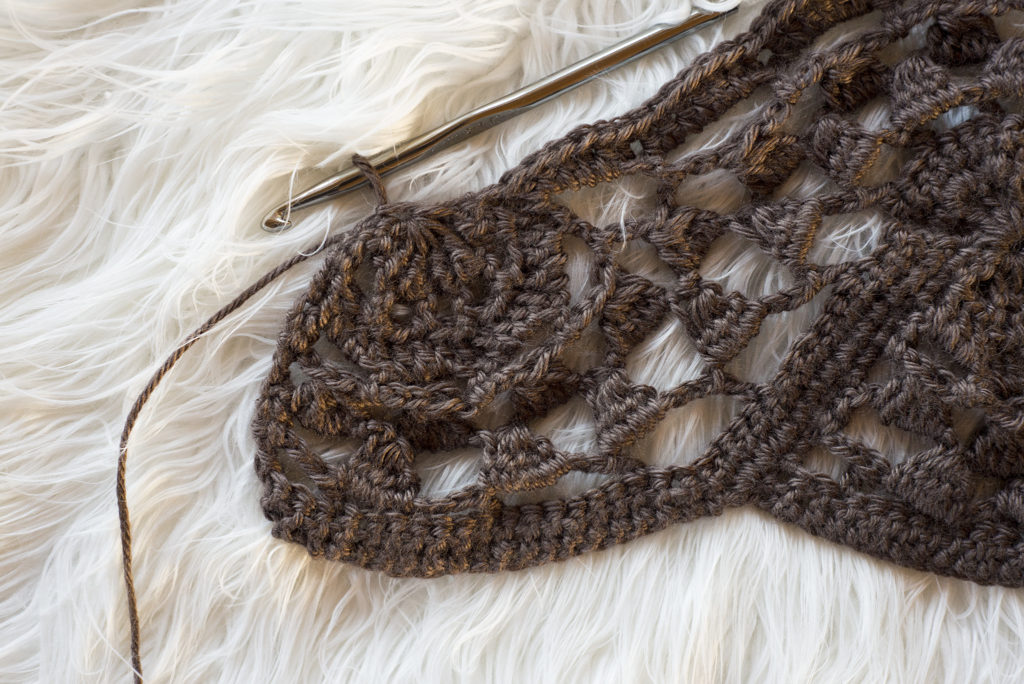
Photo 11: Row 3 completed.
Photo 12: Row 4 Completed. Note the slip stitch into edge of prior shell (orange arrow), plus two more slip sts at end of row (red arrows).
Border:
*CH5, Single crochet into next stitch, CH5, slip stitch into next three sts* Repeat all around the edge of scarf. In order to help accentuate the shape, add extra slip sts in where needed to avoid adding the border pattern on top of the join between two shells. Slip stitch to join at end.
This design, a written work and images are a copyright of
©MelodysMakings and may not be copied or reproduced in any way.
You have permission to sell finished products made from this pattern, but please leave a link to my website, www.melodys-makings.com, in your product listing specifying that I am the designer of this pattern. Thank you for supporting me as a work at home mother!

This is an utterly beautiful pattern! I hope my crochet skills are good enough to pull this pattern off!
i wish you had a knit version of this scarf!
daisy