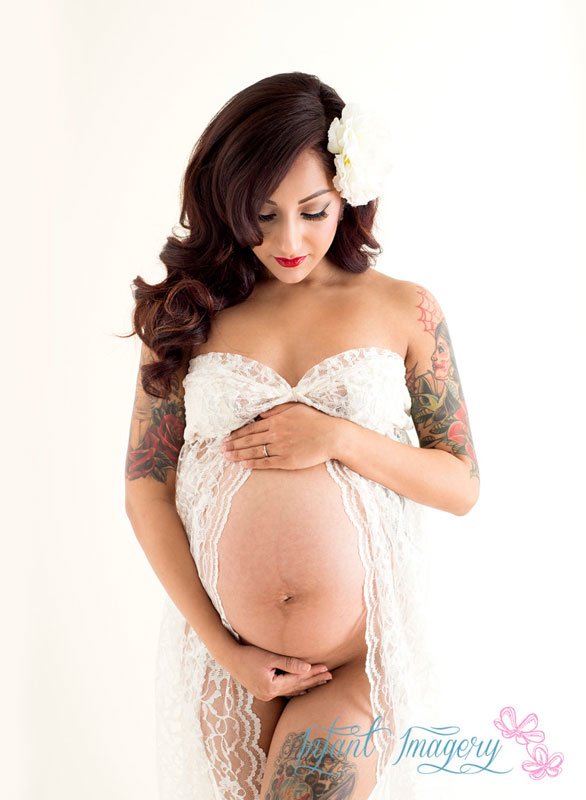
DIY Maternity Gown (A Photographer’s Dream!)
When I started photographing more expectant mothers, I really wanted to add something elegant, and special to my studio’s wardrobe. I am a huge fan of fabric wraps, and draping fabric during my Maternity sessions, but I wanted something more. I did a little bit of searching, and found some really gorgeous Maternity gowns for sale. Unfortunately, they just didn’t fit my budget.

How to Make Your Own Lace Maternity Gown
Most of the gowns were upwards of $75 and some more like $150 (which are prices I am totally supportive of and would have paid in a heartbeat if I could have). My budget was very limited at the time, and I’m a Do-It-Yourselfer at heart! So I set out to make a beautiful, lacey (because I simply can’t get enough lace into my life lately), and classic looking DIY Maternity gown.
I know many other photographers (or perhaps you own a shop where you would like to sell these gowns) are in the same position I was in, so I’ve written up this how-to tutorial. I’ve been creating these DIY maternity dresses for approx. $11 and about 2 hours of my time. I hope you find this budget friendly tutorial to be useful and fun!
Here is my disclaimer though……I am a knitter and crocheter who likes to pretend I know my way around my sewing machine occasionally. Check out my knit and crochet work on my blog here! I am by no means a seamstress. So if you actually know what you’re doing when it comes to making garments (instead of faking it like me) there are probably quite a few ways you can improve upon this tutorial. Please use it as a great base for your project and take or leave whatever parts of it you choose.
Materials:
- 2.5 Yards of lace fabric for a longer gown, and 2 Yards for a floor-length gown. My fabric was 60″ (152.5cm) from selvage to selvage. Look for fabric with beautiful edges or selvages (notice the shell design on the edge of my dress).
I found my fabric at Joann’s. Using a 50% off coupon (which they send you regularly if you sign up for their text messages) I purchased all my materials for $11. - .25 Yards of matching solid colored fabric (to be used for the bust section).
- Matching thread (or at least similar – theoretically you shouldn’t see any of it, but since lace is see-through, it doesn’t hurt to have a similar shade)
- Measuring Tape
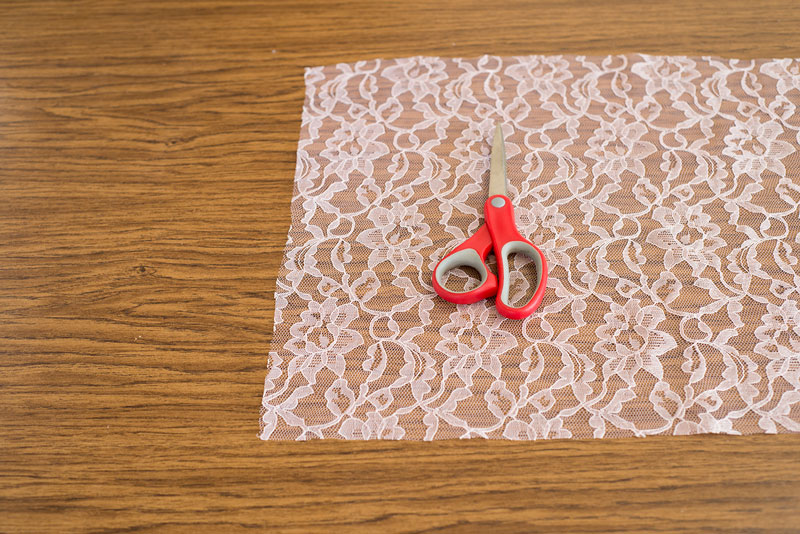
- Scissors or Rotary Cutter (I used scissors, but if you’re more of a perfectionist, you might choose to use a rotary cutter for more precision)
- Pins
DIY Maternity Gown
Step Number One
Measure the bust of the person you are creating the gown for and jot down this number. If you are un-sure what size to make, consider the following average measurements:
Small: 31-34″ (78.75-86.5cm)
Medium: 33-36″ (83.75-91.5cm)
Large: 35-39″ (89-99cm)
X-Large: 38-42″ (96.5-106.5cm)
If you are making the gown for a photography studio, you may consider making a larger size and using clamps to size the dress down if necessary. You can always clamp the extra fabric in the back (in fact this photo is using clamps in the back) but you can’t add extra.

Cut strip of fabric appropriate to the size you are making.
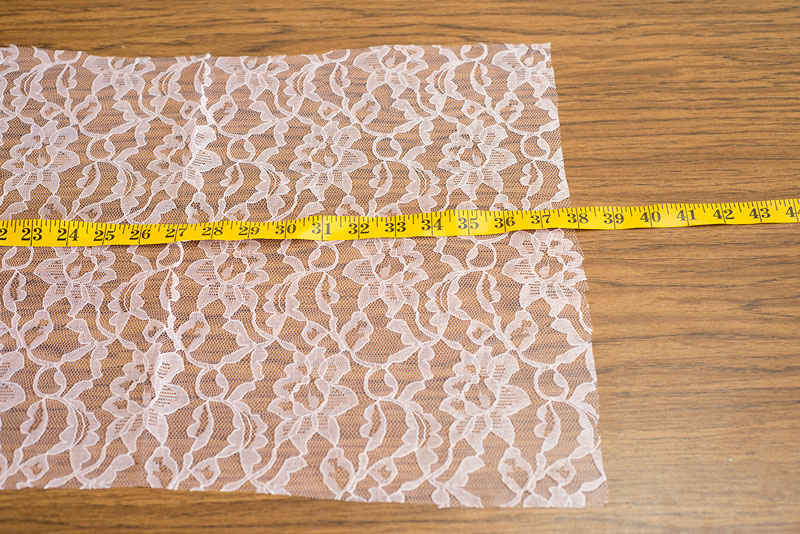
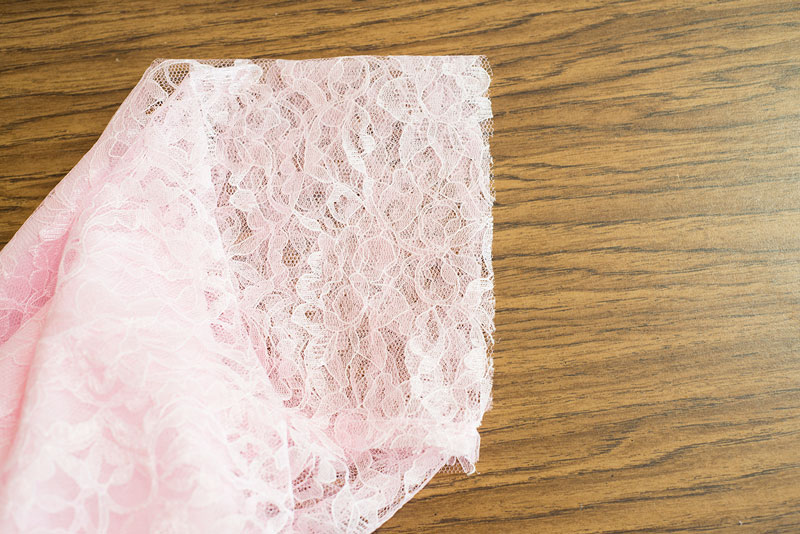
Step Number Two:
Cut approx. 16″ (40.5cm) for a small or medium sized dress, or 18″ (45.75cm) for a large or X-large sized dress off the end of your fabric, and then cut the selvage or edging off as shown.
Cut the edging or selvage off of this strip.
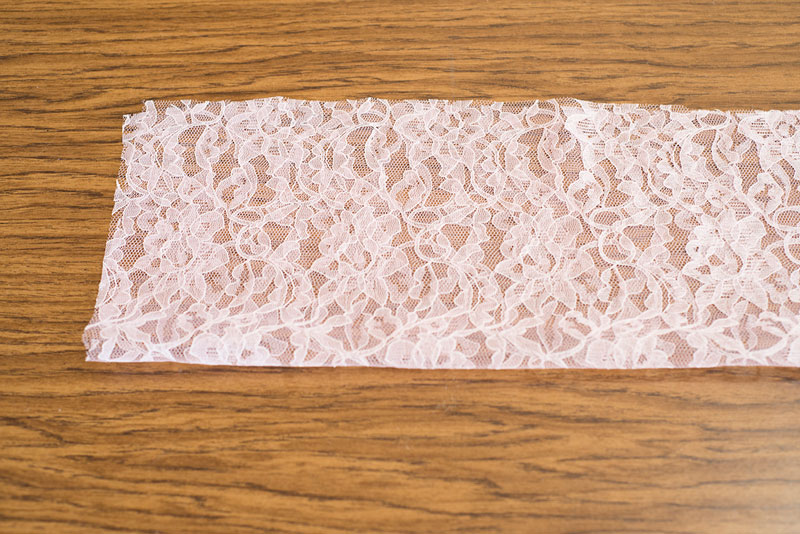
Cut this piece of fabric to your desired bust size plus .5″ (1.25cm).
Step Number Three
Cut this piece of fabric to your desired bust size plus .5 inch (1.25cm) after choosing from the chart above. I made a medium size at 37.5″ so I cut my piece of fabric to 38″ in length.
Fold your piece of fabric in half.
Step Number Four
Fold your piece of fabric in half (hot dog style, haha) so you have a long skinny strip.
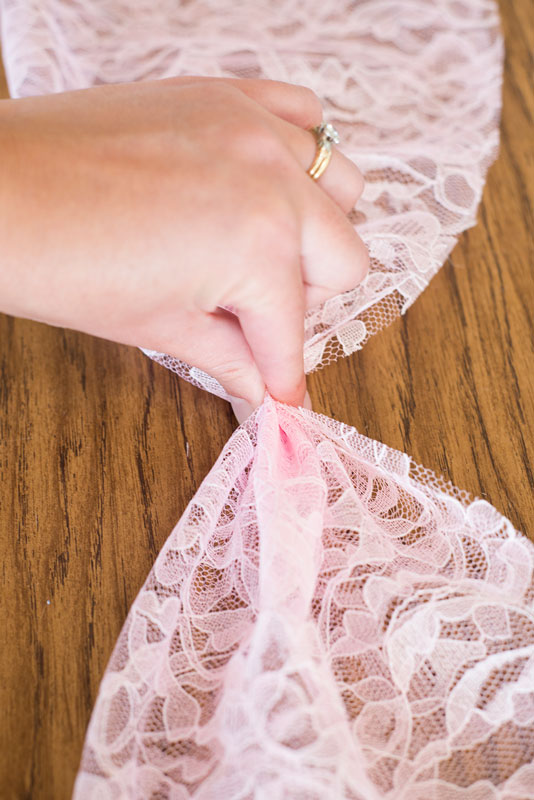
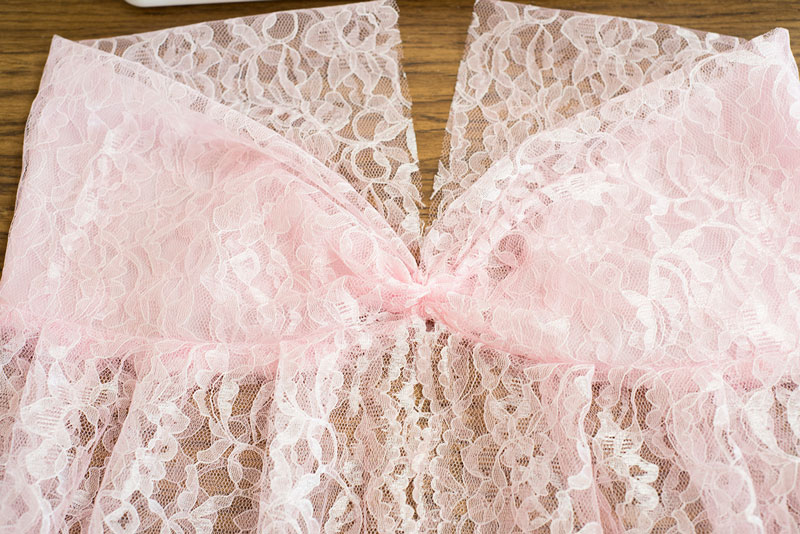
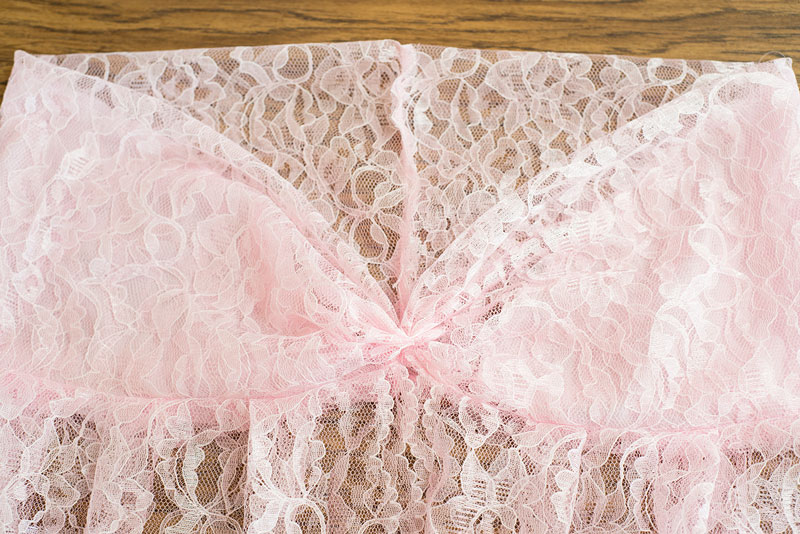
Create a gather in the direct center of your piece of fabric.
Step Number Five
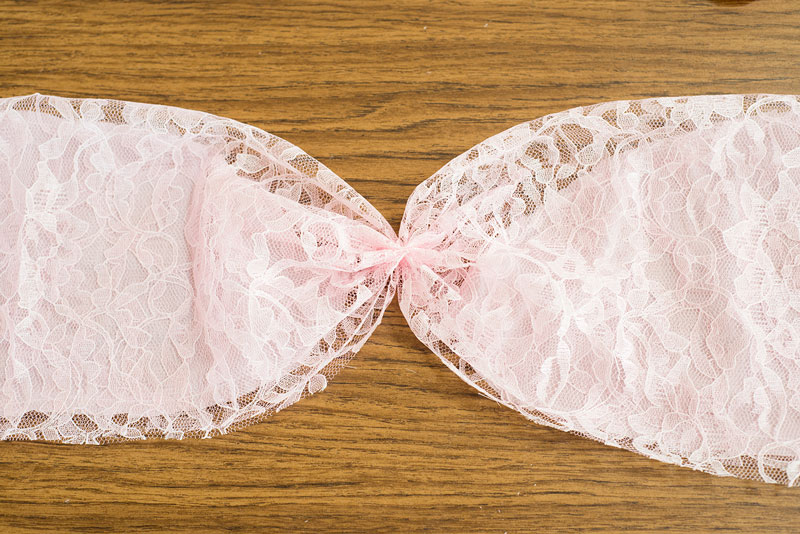
Create a gather directly in the center of this folded piece of fabric. Then sew one line down the flat part of this gather as shown.
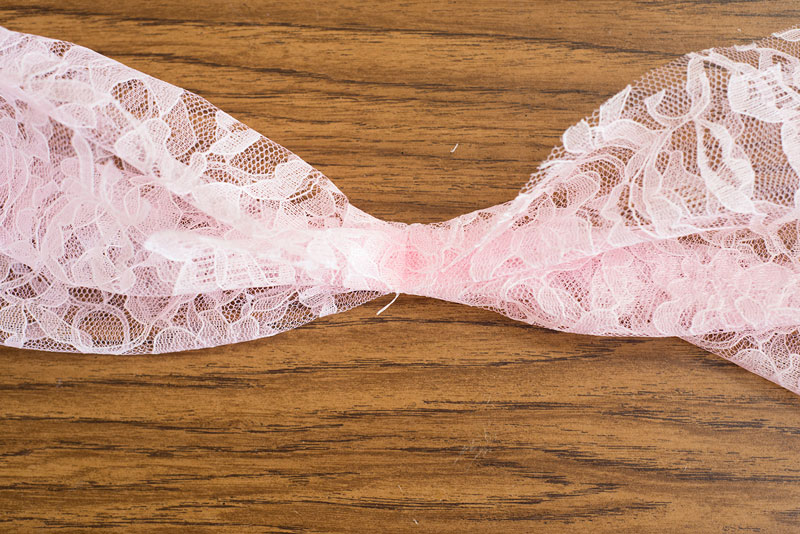
Sew one line directly down the flat part of the gather.

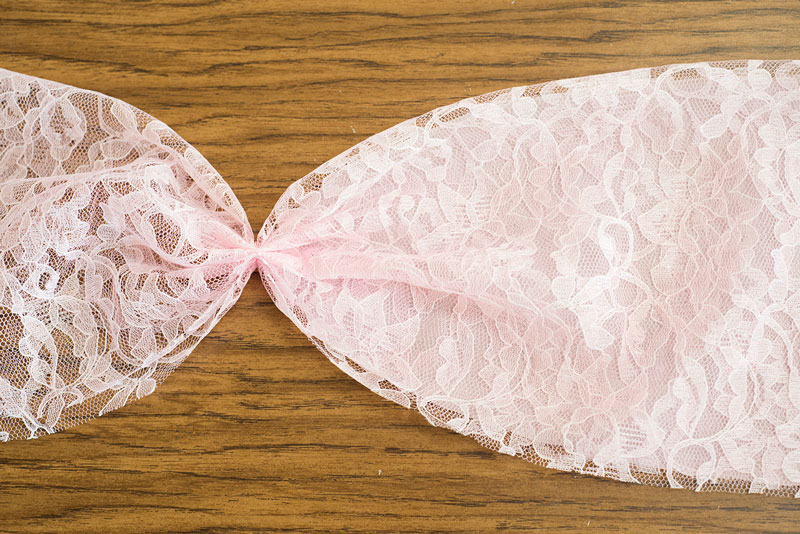
Gather after being sewn. Shown from the front.
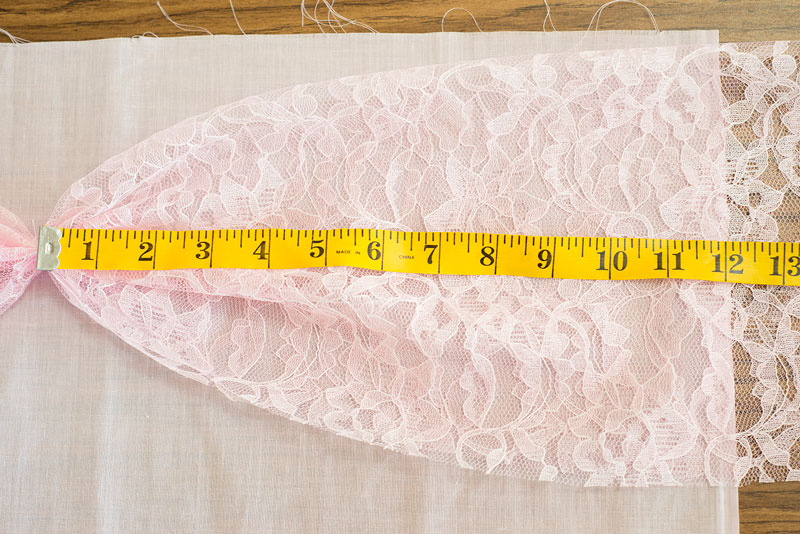
Measure approx. 10 inches (25.5cm) from center of gather.
Step Number Six
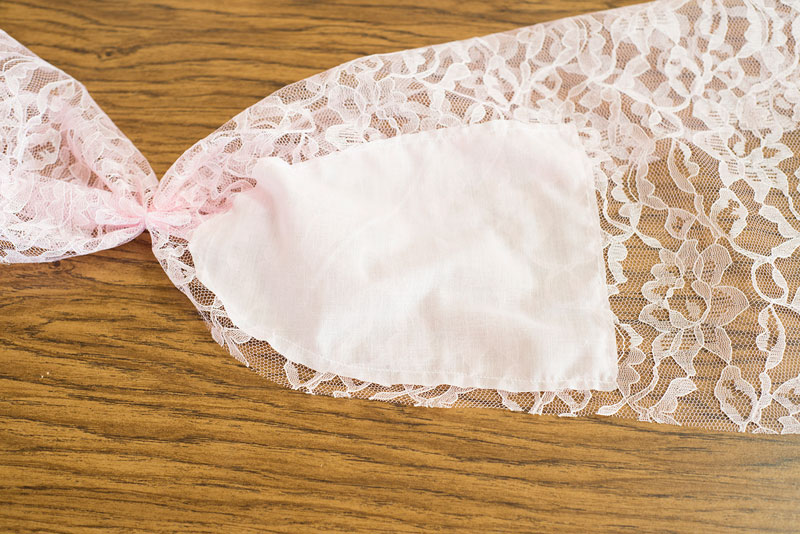
Place your gathered piece of lace fabric on top of your solid colored fabric. The solid color will be a lining for the front of the dress. Measure 10″ (25.5cm) from the center of the gather and cut your solid fabric to that length. Then cut around the entire piece of the solid colored fabric approx. .5 inch (1.25cm) from the edge of the lace fabric. This will create an inside liner.
Cut around the entire piece of solid colored fabric to create a cup liner.
Step Number Seven
Sew the liner onto the inside half of your lace fabric. Do not attach it to the outer layer. This can be tricky, but will keep any seams from showing.
Repeat for second side.
Liner Sewn into cup shown from inside.
Liners sewn into both sides shown from the front.
Pin long piece of lace fabric to the bottom edge of the bust section.
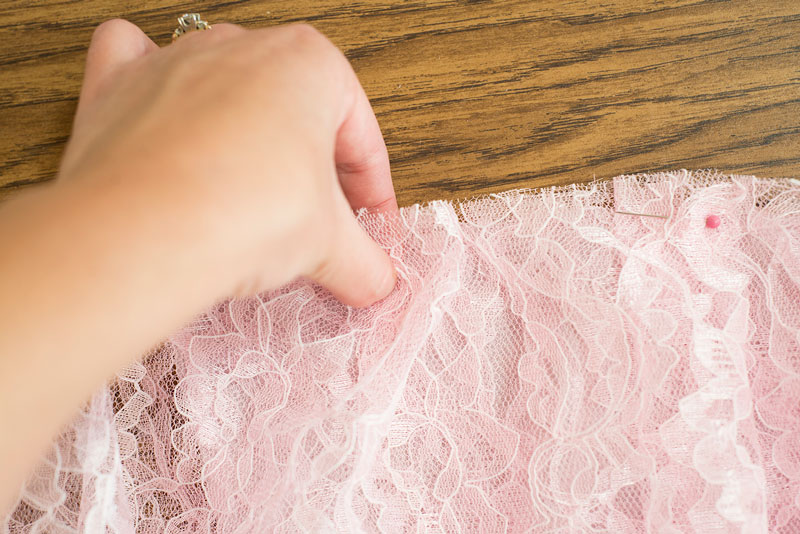
Step Number Eight
Return to your long piece of lace fabric and pin it (right sides together) to the bust section. You should pin the very edge of the fabric to the base of the gather in the bust section. Make sure you pin it to the bottom (raw edges – not the folded section) of your bust piece.
Create gathers in your fabric to get the right size.
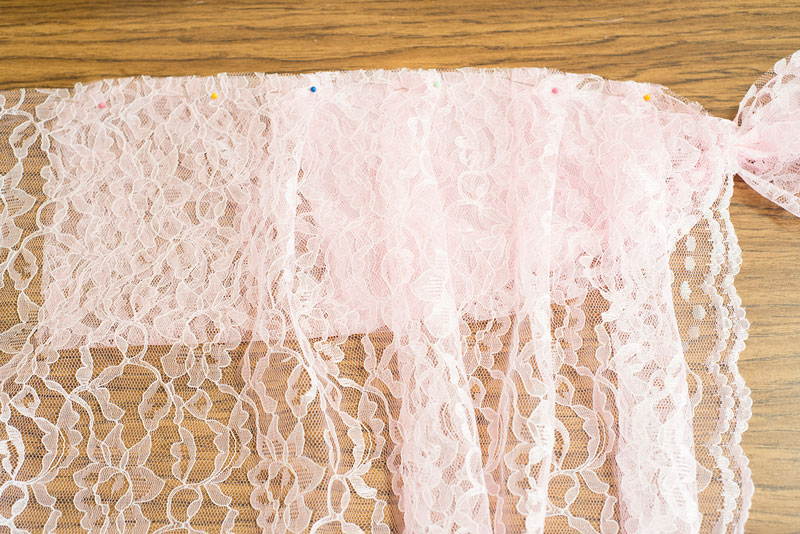
Step Number Nine
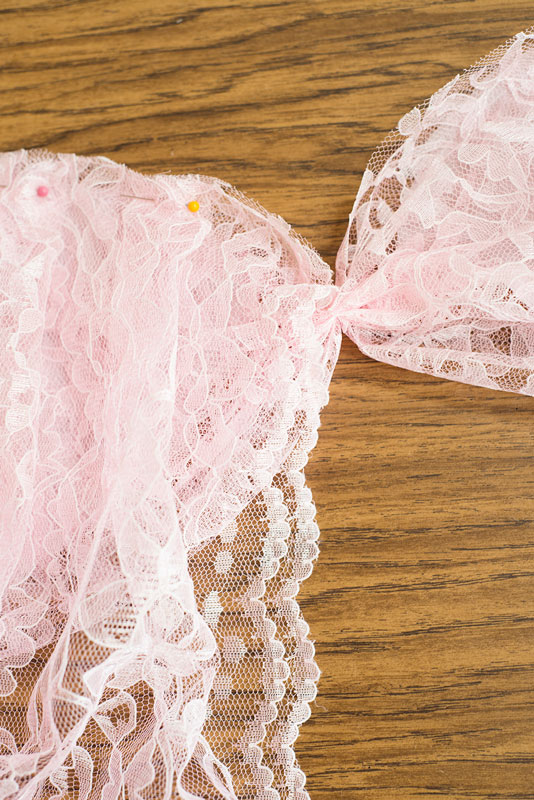
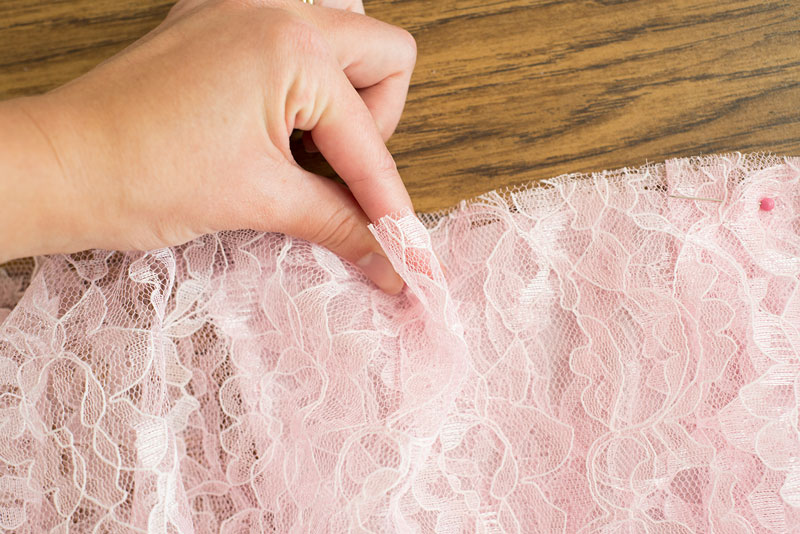
As you’re pinning your fabric, create pleats by folding the fabric over and pinning it. This will not only create a beautiful look, but will help your gown to be the right size. Since you started with 60″ (or whatever length from selvage to selvage) and you are reducing down to 38″ (or whatever size bust you chose), these pleats will make your dress the right size around without being baggy in the back.
You’ll want to use one half (measured from selvage to selvage) of your fabric on this one side of the bust. I created 4 gathers for mine.
Fold the gather over and pin it in place.
Pin across the first half of the bust.
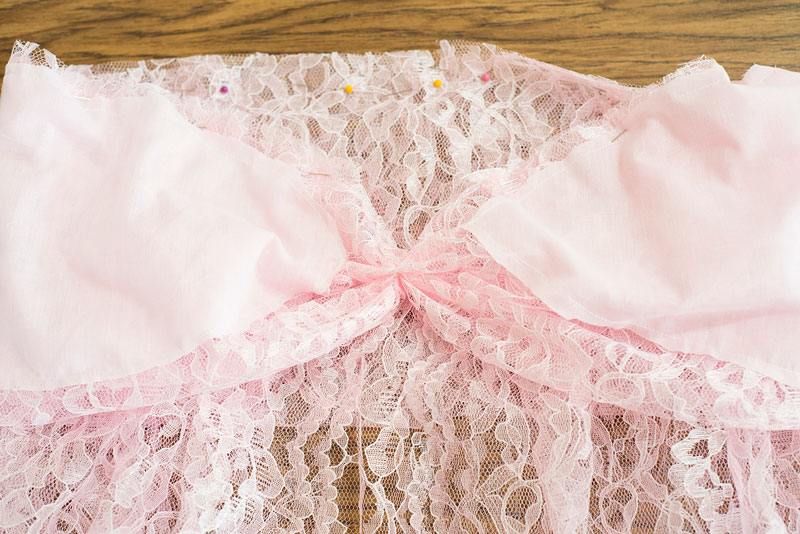
Wrap your fabric around and pin onto the second side (leave a tube in the center as that is where the person wearing it will be.
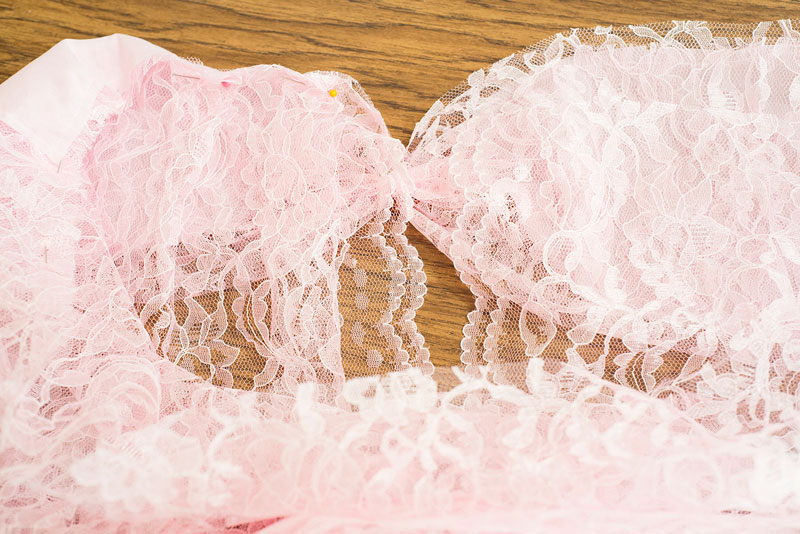
Step Number Ten
Wrap your fabric around, to the second side of the bust and repeat all the steps. Be aware of creating a tube in the center of the fabric. Make sure you don’t twist it as this is where the person wearing the dress will be.
This is what your dress will look like after you finish pinning the bust to the fabric. Shown from the inside.
Step Number Eleven
Sew around the bust section, connecting it to the gown. Start at the gather and sew all the way around, removing the pins as you sew.
This is what your gown will look like after sewing the bust on. This is shown right-side out from the front.
To close the back of the dress, fold with right-sides together and sew straight down the back.
Step Number Twelve
You will now need to sew up the back of the bust section. Fold the dress with right sides together and line up the two un-sewn edges. Sew a line straight down the back.
Hem up the bottom edge.
Finished Maternity Gown shown from the front.

Proceed to strut around the house wearing your awesome new gown!
Step Number Thirteen
Place gown over clothing and strut around the house! You know you totally want to!
Are you excited about this tutorial? Please leave me a comment telling me what you think!
Also, please share with any friends you think might like to give it a go!
DIY Lace Maternity Gown in action!
It’s a pity you don’t have a donate button! I’d most certainly donate to this superb blog!
I suppoe for now i’ll settle for book-marking and adding your RSS feed to my Google account.
I look forward to new updates and will talk about this blog with my
Facebook group. Talk soon!
WOW!! I’ve been looking online for these gowns and you are right about the price, while I would love to pay for it I just can’t afford it right now and knowing I could try to do it myself makes it priceless!! Thank you so much.
You are so welcome! I’m super glad that you found it, and I hope you get a lot of awesome use out of it. These have definitely been some of the most popular items in my studio in the past 🙂
Hi Melody,
My pregnant girlfriend asked me to looked at your site b/c she wants me to help her make this dress.
I have a question for you. How is the dress staying up? It is strapless and most store bought strapless dresses usually have boning at the side seams, underwire or stay put tape along the bustline edge to keep the dress from falling down.
I read your instructions and I am not sure if this dress will stay up once constructed.
thanks,
LaShawn
Hi LaShawn, this dress is a photo prop, so it’s not entirely necessary for it to have underwire or boning…..it’s only going to be used briefly and in one place for a photo. I just always make sure to measure my model pretty well so the measurements are right on and the fabric fits snugly. That seems to get it secure enough for the purpose it serves 🙂 Hope this helps!
Really Lovely – I neither have the time or patience to make this even though really simple. How about you make one for me and make a profit 🙂
Haha Gillian! I’ve often thought about that, but simply don’t have the time right now. There are some absolutely gorgeous ones (including ones made by this tutorial) on Etsy though 🙂
OMGosh… I’m so in love with this blog. I have looked and looked for a maternity gown and will not have my shoot done until i found one this is saw this on Pinterest. Thanks so much. I may take me a minute to make it but I’m so happy now.
Yay!! You are so very welcome! I know how you feel….I plan to make myself one for my maternity photos too. Just so classically beautiful!
Love this and love your writing style 🙂
Aw thanks, Tricia!
absolutely stunning!!!!!!! Thanks so much for sharing!!!!!!
I love this. If it is all sewn up how do you put this on? Do you put it around your head.
Hi Leah! Yep – you just slip it on over your head like you would any other dress 🙂
Pingback: Make Your Own Lace Maternity Gown (A Photographer’s Dream!) | Melodyand#39;s Makings · Life the joy!
Awesome work!! Great tutorial, I will give this a go tomorrow!!
I noticed on your Pinterest site that it said you were also selling these dresses as well for $35. How can I purchase one?
Hi Abigael! The dresses must have been for sale by someone else, as I only have the tutorial. I’m sorry! You could probably make a silk dress in the same style, you’d just need to be sure and hem the edge for a prettier edging 🙂
Also, could I use these same steps to make a silk dress in this style?
Hi! I am going to attempt to make this! Do you have a photo of the back when finished? I was wondering if you sewed the panels together or if they just flow behind? Thanks!
Hi Tiffany! I did seam the back panels on mine together. So the top section (behind the bust) has one seam in the back, but the rest is just one large piece with no seam required. You could leave it open if you wanted to ensure that the dress would fit more sizes though. Then just clothes pin or safety pin when in use.
where do you buy your fabric from? i have been searching and searching for black lace fabric and i dont want to put a lot in it. i love this tutorial! i have been looking for away to make my own maternity wraps/dresses and stumbled upon your blog. i am just starting out in photography and on a budget. this is great just trying to find pretty but not that expensive black lace fabric.
I found my lace fabric at Joann’s. Pretty inexpensive, especially if you can find one of their 50% off coupons to use when you purchase. I’ve never checked for black there though, so I’m not sure if they carry it or not. I imagine they probably do though. Good luck!
Yes I found the black at Joann and received it today. Do u sew this by hand or do use a sewing machine?
I use a machine.
Pingback: URL
Hi there – would you be able to make this maternity gown as I have lace I just do not know how to sew…. Thanks Amanda
Hello! I’m sorry, but I don’t make and sell the finished product at this time.
I love this tutorial! I just finished my dress and it turned out just as good if not better than store bought. It took me only an hour to complete, your instructions were easy to follow.. I wish it could add a picture of the dress I made because I too am proud and strutting around. 🙂 Thanks!
YAY! That is so awesome! Glad to hear it. You should send me a photo at [email protected] 🙂
none of the pictures are showing up so it is very difficult to see what to do. I’m really frustrated.
I’ve been having some website issues today, Jennifer. I’m sorry for your frustration! I’ll be back up and running smoothly soon I’m sure, so please take a break and check back.
Ack, I’m als a sewing newb and would LOVE LOVE LOVE a video cause I’m not totally understanding lol
Hi how much fabric all together did u use ?
Hello! This tutorial calls for approx. 2.5 yards of fabric for super long gown or approx. 2 yards for floor length gown.
Pingback: 2016 Resolution: More Sewing! | Underground Crafter
If you go to joann fabrics online….. you can get access to the black and right now they are having a great sale! Shipping is a flat rate of $2.99 and great prices. 😉
I am eternally grateful for this tutorial! I am right under 5 foot and had enough material left over to make my daughter a “mommy and me” dress! I modified it so it wouldn’t be so see through and added a lace trim. I wish I could show you my maternity pictures, I got so many compliments on it. Thank you thank you thank YOU!!!!
That is awesome!!! I would LOVE to see your pics if you e-mail them to me at [email protected] 🙂 I’m SO glad that it was super helpful and that it was a wonderful addition to your maternity photo session. Yay!
Do you think it’s possible to maybe buy a strapless type bra or something similar from a dollar store and just see lace to it to save some steps? I’m new to sewing so I do everything by the book. I’m not good enough to even understand short cuts.
Yes, you could probably make that work. It just might be harder to make it look totally smooth and like one piece.
Thanks for your reply, I may pin one together and see how I like it. I appreciate your post about this! Very helpful. 🙂
This was really helpful! I completely messed up the first top so I started over. I personally found it easier to save the “gathering” of the center of the top for last. It was just easier for me to keep the lace straight by doing so. I’ll definitely send you a picture of the final product once I get my photos done at the end of sept. or early Oct. Thanks again!
THANK YOU! For the idea and the post! I’ve been wanting a dress like this for my maternity photos but the prices are outrageous! I’m a DIY type of girl so this is PERFECT! I’m a hobby photographer as well and was thinking about some ways to have budget friendly props or gowns like this. Great idea! Thank you!! 🙂
Beautiful work, i love the simple elegance of it. Question, what are the ladies wearing for a bottoms? If not, what are some suggestions to complement the dress?
Most of the ladies just wear nude underwear 🙂
Thanks!
I had not seen this before. It is so cute! I just might have to make one.